Saturday, December 10, 2011

***snOw mAn***

I seen this cute idea on pinterest to make a snowman out of 3 different sized wreaths. Theres was a bit different than mine but I just kinda did it as I went along.! Its such a great idea because you can leave it up for as long as its cold outside! I love Christmas decorations but I feel like I should take them down before December even gets over! So a snowman is a great idea!
I just laid them out in a row to wire together.

Wrap the wire around to the back side so its not showing and twist it tight so they stay close together.

I added a few bells to the crafting wire in place of buttons

Tied some fabric for a scarf

I think he turned out cute, but I cant decide if I want to put a beanie on him or not!!

Tuesday, October 25, 2011

MuCh nEEded upDate!!

This post is much needed! We have all been so busy with a new baby, jobs, and keeping up with our kids! Here are 3 of the newest things I have reDONE! ENJOY!


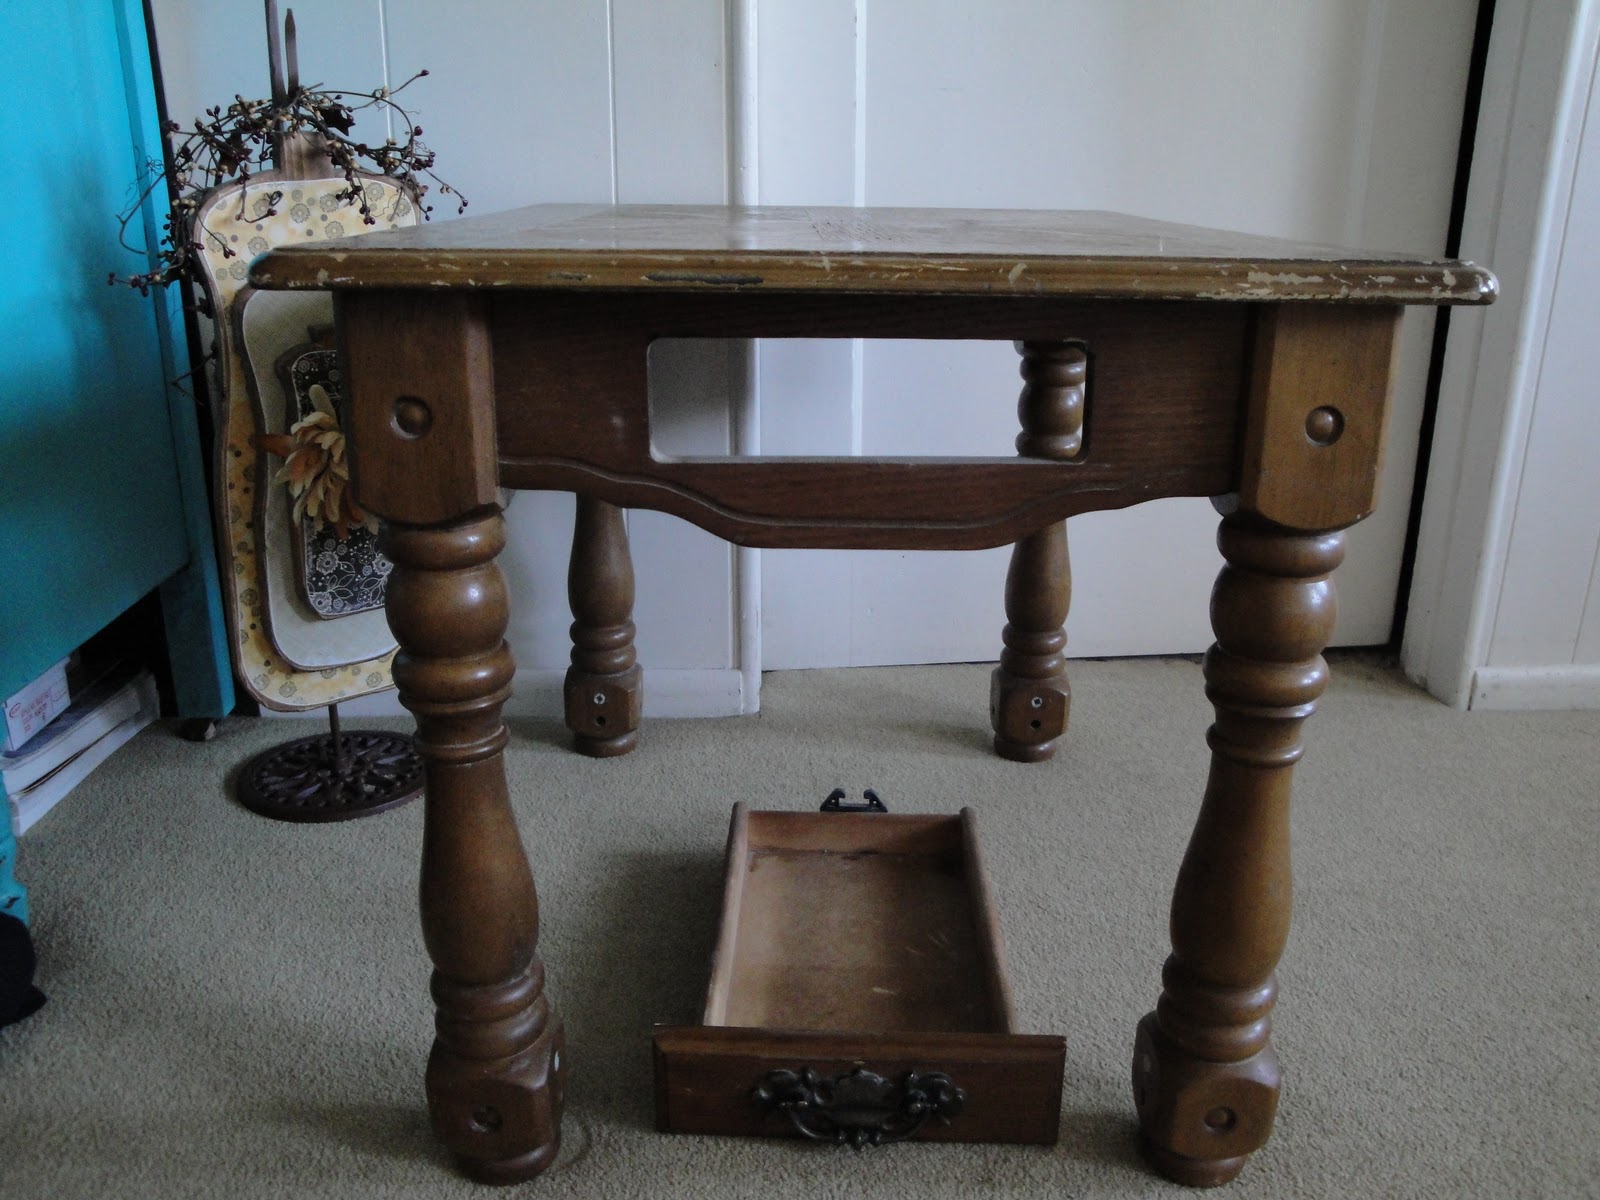
My sister in laws mother had this little side table at her house and wasnt using it! I seen it and HAD to have it! It has so much potential! Here is what it looked like before I starting tearing it up!


 Dont you LOVE all that detail?? Cuz I sure do! I started off by cleaning it with soap and water. Got it all primed and sanded.


Then on went the paint!

All glazed up!

I am using it for my daughters tv for her bedroom! I LOVE how it turned out! I just realized that I do not have the handle on it. Its the original handle, just black!


Next up...!


I seen an idea on pinterest to make these little holders for your dish soaps and scrubbies. I made this for a cookie or cupcake holder! Or even for a CAKE!

I got this cute plate from my sister, which she got from the St George D.I. (im not sure if its a plate or not, it reminds me of a oven topper)!


This next piece was part of an old lamp, I also have some old candle holders that I am going to use for a few different ones, but I like this big chunky one the best!

It started out this UGLY gold color!


(left-old lamp right-candle stick)

I primed it up, and painted it a light green, added black glaze and WAAH-LAAH!

Perfect holder for cupcakes and my cookies!


KITCHEN TABLE!


I had to google this picture because I dont have a before picture of my table. This is exactly what mine looks/(or should I say LOOKED like) except mine had a big spill of black paint in the middle.. haha thats another story.. Anywho, I sanded it all down to remove the clear sealant that was on the table. I primed and painted! I did it this pretty tan color, I wanted something warm that would match pretty much anything!


After I let this dry I added my black glaze! Can you tell that I am pretty much OBSESSED with black glazing?! Its my favorite!

and... another.....
Im thinking about putting a black damask pattern on the top, I just havent got that far yet. Although I do like this! So its staying this way for now! My chairs are solid black!

Monday, August 15, 2011

**OLD rOcker**

I went to a few yardsales a few months back and I fell in LOVE with this old rocker! It was just hangin out in the corner and I was so excited to purchase it! It looked good as it was, (minus the major scratches in it).. but of course I couldnt keep it that way! I could see the potential this guy had!


 I did the same turquoise that I did on the old dresser my mom gave me!  Roughed it up a bit, then I glazed it with black glaze. . For some reason the picture makes the seat look overly glazed. In real life it looks soo old and I love it! I was thinking about making a cushion for it, but I havent decided yet!


**LiTTle rEd hUtch**


My sister gave me this red hutch of hers! I was so excited to get it! I usually would have kept it red, since my favorite house color was red for the longest time! I decided to do it a neutral color so I could use it anywhere in my house! (and I was trying to get some different colors in my house) I sanded the red paint off.. (talk about a pain in the butt)! Then hand painted it with a roller and sponge brush. It took about three coats to cover it fully. The red kept seeping through even though I had sanded it. It was a pain but I sure do like how it turned out!

It had chicken wire on the doors, but I didnt want people to be able to see what was inside. I had looked for some baskets for quite a while to go in it, but never found any so this is what I came up with!

 
One day I will have a new house and this will be in my foyer! Until than, this is where it will have to stay!
Now I can hide all my goodies inside without anybody being able to see all my junk!

Sunday, August 7, 2011

Sneak peak of my next project!!

This is my dresser and I am planning on painting it to match my room!

Here are the rest of my projects that I finished this weekend, all from D.I. and yardsales! Love them! Keep checking our blog for the latest projects!! I have a busy week ahead of me! And alot more projects to finish!

part 3


 Here are some more frames that were from part 1 of my projects for AUg. Sorry if its complicated to keep up with me! I went on a 3 day bing of painting while my hubby is away fighting fires! I get bored and start projects and cant stop for days at a time! these frames were so fun to redo, I am selling these in the craft show this fall, they are all shapes and sizes, I removed the glass because I hate glass, it looks so much better without the glare of the glass.
This is a yardsale frame, I love the detail, it was an ugly brown I redid it in the little bottles of acrylic paint. Close to the pistacio spray paint I used but I didnt want to chance ruining this with spraypaint. Then I glazed it with 2 coats so it would bring out the detail in the frame. Now I just need to find a cute picture to put in it!

 here is a full view of the frame.
This is a chair I talked a guy into selling it for $5. He was asking $25 for it! It was a brown color, once again I forgot to take a before pic, but it is a very old chair! The padding was all torn and dusty, I bought this cute material at a store I found here in cedar, it matches my kitchen with all the red and black! I love the mismatched chairs for the table!
This is my table I posted the before in the first blog for august. It was brown, and I painted it black then glazed it with a dark brown glaze. I love this table dont think Im gonna be able to let this one go either!

more projects before and after ~tasha~

Ok here are some more before and afters of the blog I posted earlier, I guess I tried to download too much my computer shut down!! So this is like part 2 of the last blog!
 This is a shelf, one of the first projects I actually MADE WITHOUT MY HUSBAND!!! I was so proud, I painted it the same color as my accent wall in my room. I was so proud of myself for accomplishing something  by myself! If you want further details on how I made this shelf reply to this blog and I will email you details on how I made it! Once again I forgot to take pics in the process so this is all I got!
I got this frame at a yardsale for 50 cents! It was an ugly brown color I spray painted it blue and glazed it with a dark glaze! It turned out so cute!

 This pic wouldnt turn upright but this was another treasure from D.I. I loved this basket, it was yellow and an ugly brown. I painted it the pistacio spray paint like my other green projects.
These are some of the frames redone from my last blog, ill get another pic of them posted I did alot of different colors! I love frames that add color to your decorating!

more treaseures I have redone ~tasha~

I have had a busy week redoing some frames and chairs for my home and to sale at the craft show this fall! Here is a little sneak peek at whats to come!
 These frames and shelf I have collected from deseret industries, yardsales, and family who are getting rid of their junk!!
This is a finished hutch that was gold and only $5 at a yardsale in delta, I painted it with Krylon spray paint in Pistacio, I forgot to take a before pic but it turned out way cute and is holding towels in my kids bathroom!
 This is a bedframe I found at deseret industries for $10, all it needed was a fresh coat of paint and it was good as new!
 I redid this table as well, this one went in my living room as an end table! I just fall in love with all my projects I dont want to get rid of them!!
 This is my end table for my downstairs living room, i got it at a yardsale I think, it was like $10, I sanded and repainted it, it is my favorite table in the house, I bought a new knob for it at home depot for $3.00 I used acrylic paint in the little bottle from walmart for this one, spray paint just didnt stick very well to it, I like using the little bottles for these kind of projects, it dries fast and it looks so much better after glazing it.


 This is the after of my table project! I loved doing this one, I love the color, just a hint thru my house brightens it up alot!

These are a few frames I redid that I found at yardsales and D.I. turned out so cute!

Friday, August 5, 2011

~more projects~


This is a before and after of a little chest my mother in law found me and let me have! It turned out so cute, I painted it with white wood paint and glazed it with a dark almost black glaze.

Summer projects ~tasha~

So I have not had the chance to do much with my drab to fab projects, but this week I have got alot done and am back to finding time to finish my projects!!!
I found this magnetic board at d.i. for $2.00, we redid it for my sons room!
 I got this chair at a yardsale for $3.00 my son austin helped me paint and glaze it, its for his room!!